Segment and track sparse cells
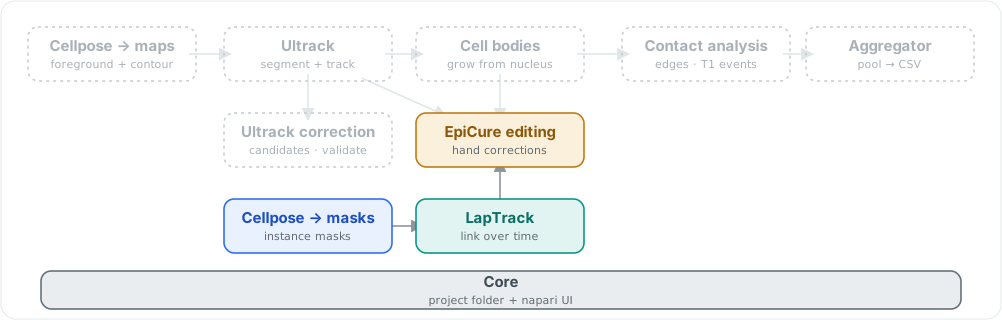
itasc-cellpose ships the sparse path: Cellpose masks linked across time by LapTrack and corrected by hand with EpiCure, on the shared Core. Solid chips are shipped; dashed are the rest of the family.
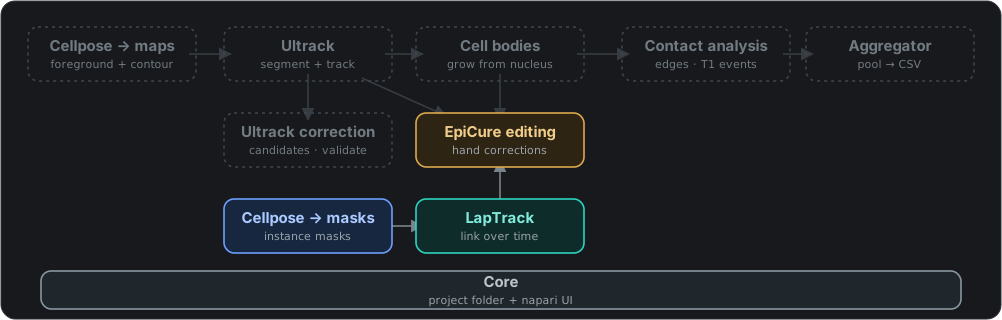
itasc-cellpose ships the sparse path: Cellpose masks linked across time by LapTrack and corrected by hand with EpiCure, on the shared Core. Solid chips are shipped; dashed are the rest of the family.
itasc-cellpose is the Cellpose stage on its own, run inside the napari viewer.
Bind it to an image, get tracked labels back, correct them, and keep what you
want. Reach for it when you already have a stack open and want
Cellpose masks and time tracks without
the full pipeline’s project folder.
That absence is the main difference from the full itasc[all] app, which works
through a folder on disk, each stage reading and writing files. This tool touches
no folder: a run leaves its results in the viewer, and nothing is saved unless you
choose to.
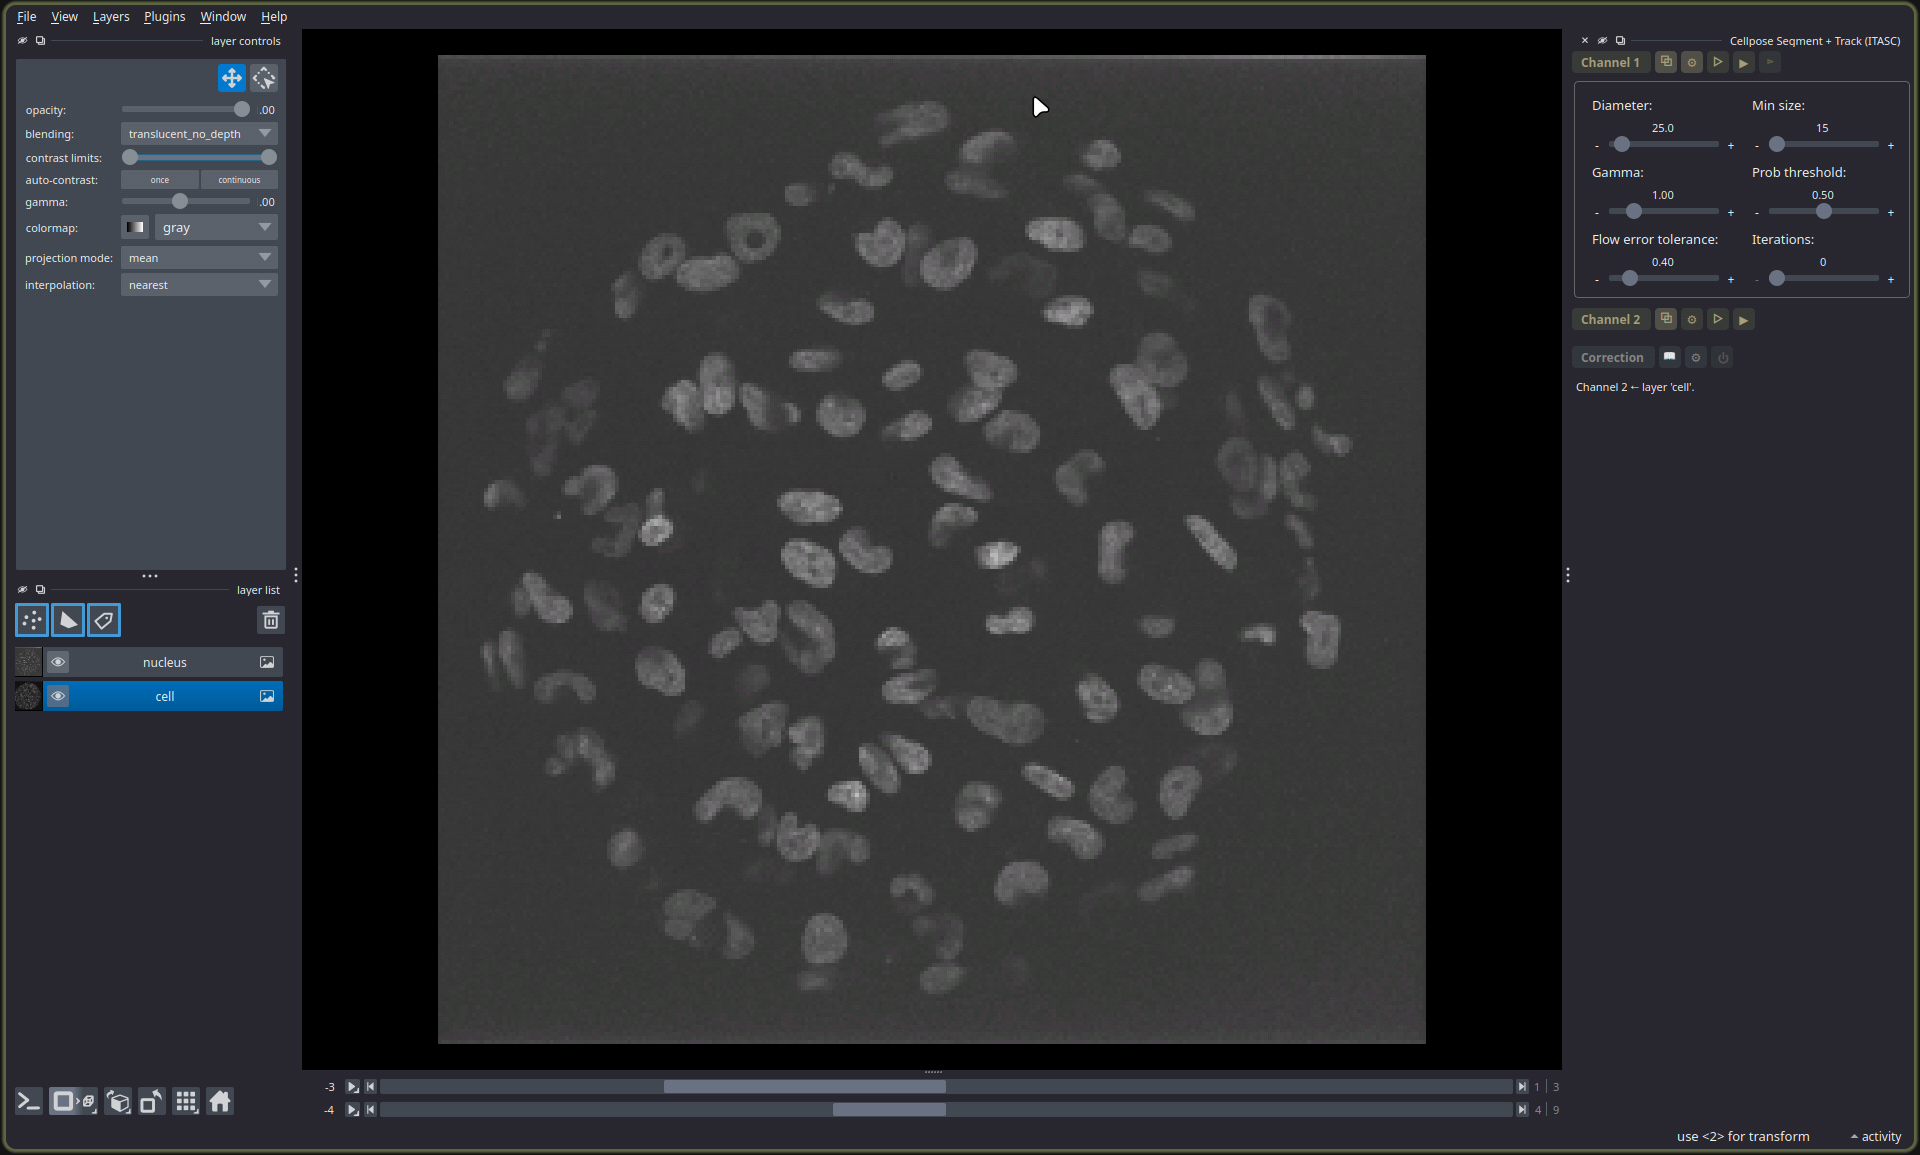
The Cellpose Segment + Track panel, with the open nucleus and cell images
bound to its two channels. The controls above tune the segmentation.
One channel or two
With one channel, Cellpose finds the objects in each frame and links them across
time into tracks with laptrack. The shapes
are Cellpose’s own, drawn directly; the full app stops a step earlier and builds
its shapes another way.
With a second channel, the two are read together, so the first helps Cellpose find the objects in the second: a nucleus channel makes the cell bodies come out much cleaner. Each object in the second channel is matched to one in the first and inherits its track, so a cell carries the identity of the nucleus inside it. By convention the first channel is the nucleus and the second the cell, though the tool does not require it.
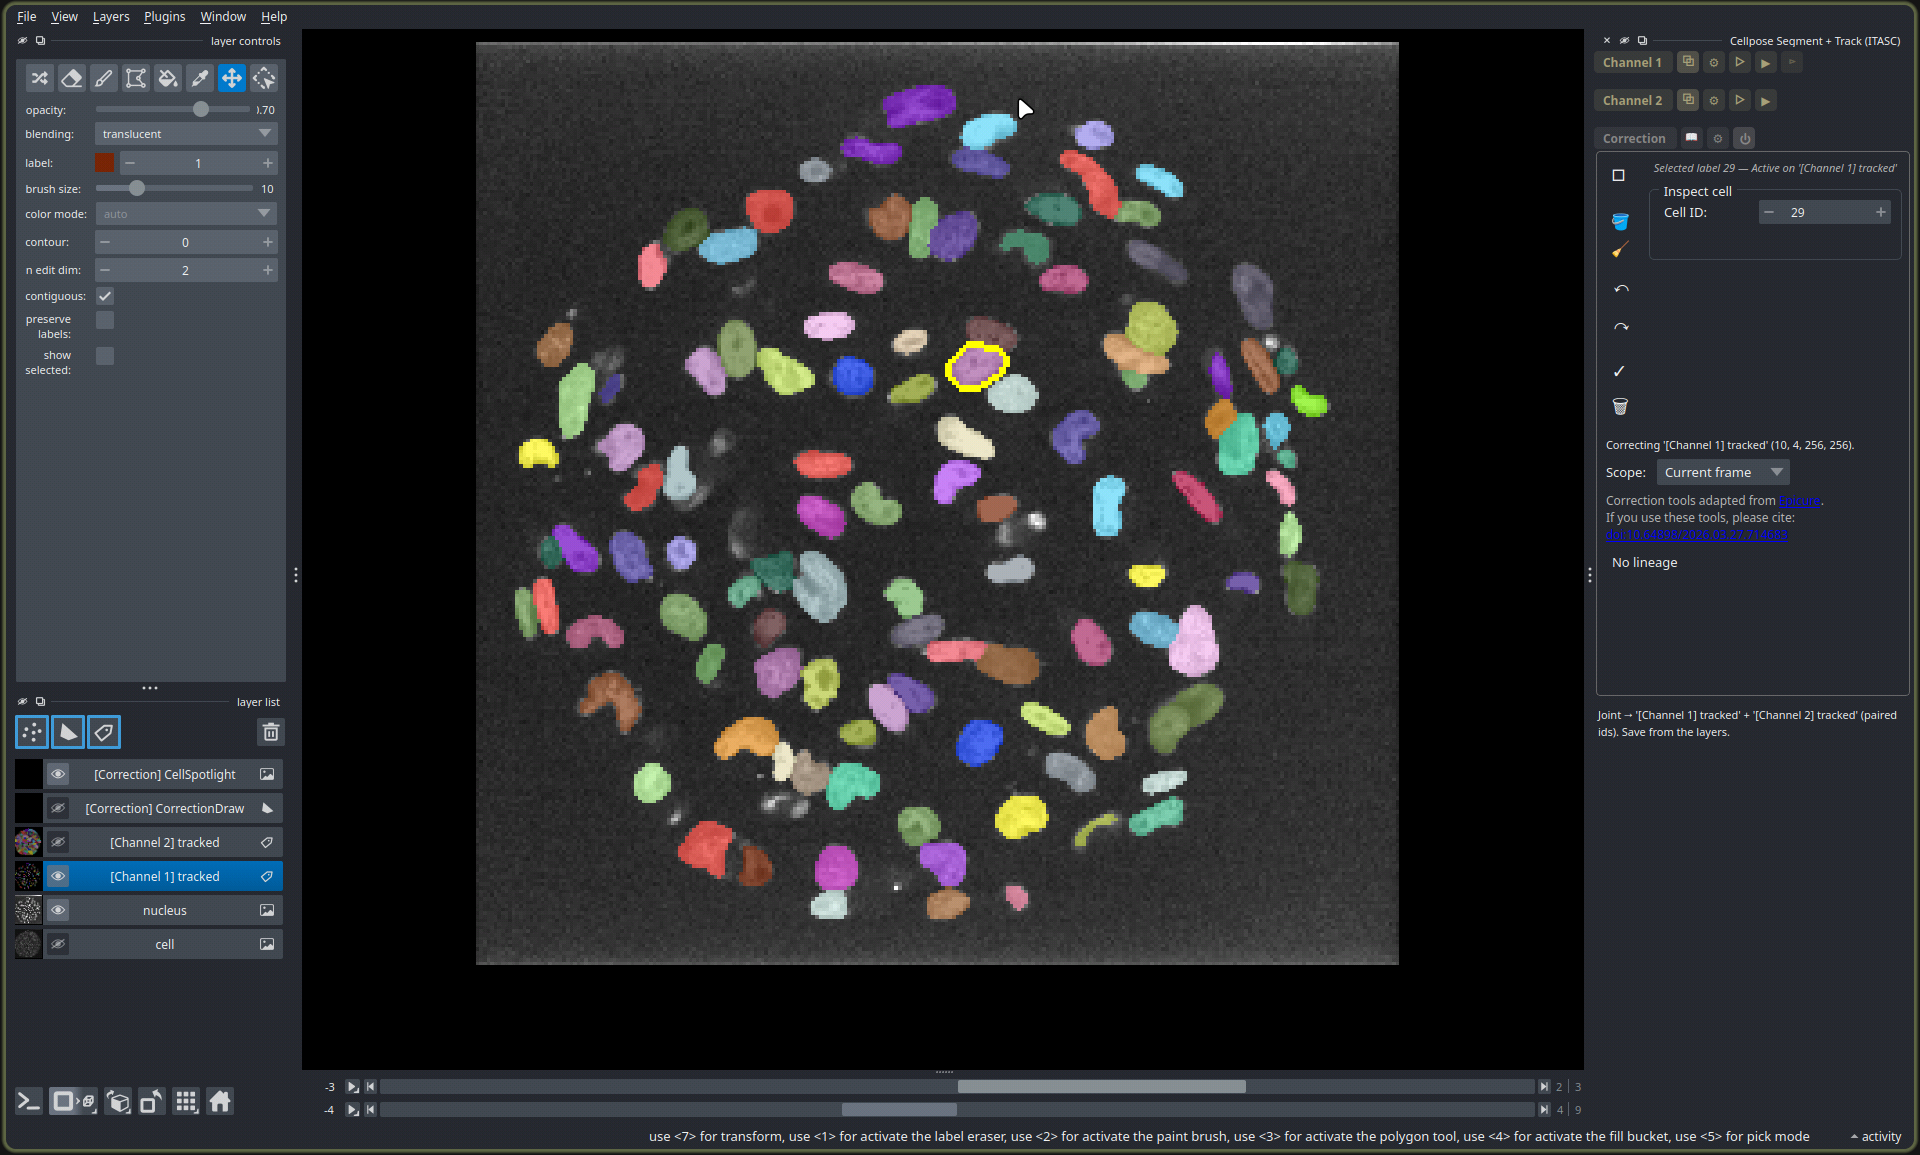
A finished two-channel run. The tracked [Channel 1] and [Channel 2] labels sit
above the nucleus and cell inputs; the Correction panel below edits
whichever labels are active. Nothing is saved until you save the layers.
Running it
To try it before you have data of your own, download
itasc-sample-data.zip
(12 MB), then open the nucleus and cell stacks from any posNN/0_input/ and
bind them as the two channels.
Select an image in the viewer and bind it to a channel with the channel’s bind button; there is no file to open. Preview (▷) tries the current frame so you can adjust the controls before committing; it also shows the probability and flow maps Cellpose works from. Segment (▶) runs the whole stack, and Track (⊳) links the objects across time. Bind a second channel to read the two together.
The results arrive as label layers. Correct any mistakes in the panel below, then save the layers you want with File → Save Selected Layers.
Correcting labels
The Correction panel edits whichever label layer is active, in place. Its tools are adapted from EpiCure:
Select a cell with left-click, spawn one with middle-click on empty space, erase one with middle-click (or
Delete).Merge two cells with
Ctrl+left, draw or split withShift+left or right-drag.Swap or attach to a track with
Ctrl+right, grow or link the selected track withCtrl+middle.Retrack from the current frame outward:
Eforward,Qbackward.Fill holes, clear stranded fragments, and
Ctrl+Zto undo.
Save the corrected layer with File → Save Selected Layers.
Install
pip install "itasc-cellpose[cellpose,laptrack]"
The [cellpose] extra adds the Cellpose-SAM model (cellpose, torch,
torchvision), [laptrack] adds the time tracker; both are imported lazily, so
import itasc.cellpose works without them. To run it as a napari app instead of
installing into your own environment, the
install guide sets up
napari and the tool together.
Scripting
The rest of this page is reference for scripting the tool; skip it if you only
drive the widget. Everything the widget does is available headless and Qt-free
under itasc.cellpose:
import tifffile
from itasc.cellpose import cellpose_runner, native_masks, track_laptrack

stack = cellpose_runner.to_tzyx(tifffile.imread("cell.tif"), "2D+t")
params = cellpose_runner.CellParams(diameter=0.0, min_size=0, gamma=1.0)
masks = native_masks.run_cell_masks_stack(stack, params)       # (T, Z, Y, X)
tracked = track_laptrack.track_masks(masks, max_distance=15.0)  # tracked labels
Input is any 2-D to 4-D image layer per channel, bound from the active layer;
there is no file loading and no layout to declare. Every plane is segmented
individually; for tracking the shorter leading axis is read as Z, the longer as
time. Channel 1 is required, Channel 2 optional. Output is napari layers, not
files: int32 Labels layers tagged [Channel 1] and [Channel 2], saved with
napari’s Save Selected Layers.
The integrated ITASC app reuses this distribution’s Cellpose runner for its own in-app stage; those modules ship here and are imported by the orchestrator. This document covers the standalone napari tool.